How to Shabby Chic a Bedside Table
|
Time to read 10 min
|
Time to read 10 min
Hello, darling! Let me share something rather personal with you - my grandmother's old pine bedside table sits in my bedroom right now, transformed from a tired piece of furniture into the most gorgeous shabby chic centrepiece.
I've been working with vintage furniture for over fifteen years, and there's something absolutely magical about breathing new life into forgotten pieces. Today, I'm going to walk you through exactly how to shabby chic a bedside table, sharing all the professional tricks I've learned along the way. We'll cover everything from choosing the right colours to mastering that perfect distressed finish that makes people ask "where on earth did you find such a beautiful antique?" (when actually, you created it yourself in your garage last weekend).
The beauty of shabby chic lies in its imperfect perfection.
Rather like a well-loved garden that's had years to develop character, your bedside table should tell a story through gentle wear, soft colours, and thoughtful details. This isn't about creating something that looks brand new - quite the opposite, actually! We're aiming for that magical quality where every gentle scratch and faded patch whispers of romantic history and cherished memories.
Picture walking into a room that feels like a scene from a romantic novel - that's the essence of shabby chic.
This design style emerged in the 1980s, championed by Rachel Ashwell, and it's rather like combining the elegance of French country style with the comfort of English cottage charm. In a shabby chic bedroom, you'll find weathered furniture pieces that look as though they've been treasured for generations. The colour palette typically revolves around soft whites, gentle pinks, sage greens, and dusty blues - colours that whisper rather than shout.
Think of it as creating a space where Marie Antoinette might have felt perfectly at home, but with all the comfort of modern living.
The key elements include distressed paintwork, vintage textiles, and plenty of natural textures. Fresh flowers are essential (I always keep white roses or peonies nearby), and mirrors with ornate frames help bounce light around the room. Remember, darling, it's about creating layers of softness and romance. What sets shabby chic apart from other vintage styles is its deliberate imperfection.
Designing a Shabby Chic Interior? Check Out Our Shabby Chic Bedside Table Collection.
Right, let's get our hands dirty!
Creating a shabby chic bedside table is surprisingly straightforward once you understand the essential steps. I've transformed countless pieces over the years, and the process never fails to surprise me with its therapeutic qualities. There's something rather meditative about gently sanding away years of wear to reveal the wood beneath, then building up new layers of colour and character.
Start with a good clean using sugar soap or a gentle degreaser.
You'd be amazed how much grime can accumulate over the years! Once it's sparkling clean, give it a light sand with 120-grit sandpaper. We're not trying to strip everything back - just creating a surface that paint will happily stick to. The painting stage is where personality really shines through. I typically use chalk paint or milk paint because they create that perfect matte finish that's so characteristic of shabby chic.
Apply your base coat evenly, but don't worry about perfection - slight brush marks actually add to the charm.
Here's where it gets exciting - the distressing! Once your paint is completely dry, take some fine sandpaper and gently work areas that would naturally wear over time. Think about where hands would grip, where items might scrape, and where general wear would occur. The corners of drawers, edges of tops, and around handles are perfect starting points. The key is building up the distressing gradually - you can always sand more, but you can't put the paint back once it's gone!
Redesigning your Bedroom? Check Out Our Solid Wood Shabby Chic Bedside Tables
The shabby chic colour palette is rather like a collection of faded watercolours - soft, muted, and utterly romantic. After years of working with these colours, I can tell you that the secret lies in choosing shades that look as though they've been gently bleached by sunlight over many years.
Classic shabby chic colours include duck egg blue, soft sage green, dusty pink, antique white, and warm grey. Think of colours you might find in an English country garden after a gentle morning mist - everything is softened and romantically hazy. French linen, old rose, and weathered sage are particular favourites of mine.
What's crucial to understand is that these colours work because they're all from the same tonal family. They share an underlying softness that means they complement rather than compete with each other. It's rather like assembling a wardrobe - everything should work together harmoniously.
Colour Name |
Paint Code Reference |
Best Used For |
Complementary Colours |
|---|---|---|---|
Duck Egg Blue |
Farrow & Ball No. 82 |
Main furniture pieces |
Warm whites, soft greys |
French Linen |
Annie Sloan Chalk Paint |
Larger surfaces |
Old rose, cream |
Old Rose |
Annie Sloan Chalk Paint |
Accent pieces |
Sage green, antique white |
Sage Green |
Various suppliers |
Drawers, details |
Duck egg, soft pink |
Antique White |
Most paint ranges |
Base coats, highlights |
All shabby chic colours |
The beauty of these colours is their versatility. You can use duck egg blue as your main colour and add touches of old rose in the details, or go for a soft sage green with antique white distressing. I've seen stunning pieces where the entire palette was different shades of white and cream - absolutely gorgeous!
Remember, darling, lighting affects how these colours appear throughout the day. What looks perfect in morning light might seem different in the evening, so do test your colours in various lights before committing to large surfaces.
This is a question I hear constantly, and I completely understand the confusion! While both styles celebrate a relaxed, lived-in feel, they're actually quite different in their origins and aesthetic approach. Think of it as the difference between a English cottage garden and a Moroccan riad - both beautiful, but distinctly different personalities.
Shabby chic, as we've discussed, focuses on soft, muted colours and deliberately distressed European-inspired furniture. It's rather like stepping into a romantic period drama - everything feels gentle, feminine, and elegantly aged. The palette stays within those soft pastels we talked about earlier.
Boho (short for bohemian), on the other hand, is much more eclectic and globally inspired. Where shabby chic whispers, boho sings - sometimes quite loudly! You'll find rich jewel tones, intricate patterns, and influences from around the world. Think vibrant textiles from India, Moroccan lanterns, and furniture pieces that tell stories of distant travels.
The key difference lies in the approach to colour and pattern. Shabby chic maintains a cohesive, soft palette, while boho celebrates the beautiful chaos of mixing different cultures, colours, and textures. Both styles love vintage pieces, but they treat them very differently.
Now, let's chat about the final details that transform your lovely painted piece into a true shabby chic masterpiece. The styling is rather like the accessories you choose for an outfit - they can make or break the entire look.
Hardware selection is crucial. I always recommend replacing modern handles with vintage-inspired pieces. Look for glass knobs, ornate metal pulls, or ceramic handles with floral motifs. Car boot sales and antique shops are treasure troves for authentic period hardware, though reproduction pieces from specialist suppliers work beautifully too.
Consider the finish carefully. While paint creates the base, it's the final protective coating that gives your piece its character. Clear wax provides a subtle sheen and excellent protection, while dark wax can be worked into crevices to enhance the aged appearance. Some pieces benefit from a very light coat of crackle medium before painting to create authentic-looking aged cracks.
The top surface deserves special attention. A piece of vintage lace, a small doily, or even a beautifully aged piece of fabric can add texture and interest. I often use vintage tea towels or pieces of old linen - they're practical and gorgeous!
Don't forget about the interior of drawers. A lovely floral paper lining or even just a fresh coat of paint in a complementary colour makes opening the drawer a delightful experience. It's these hidden details that show real care and attention.
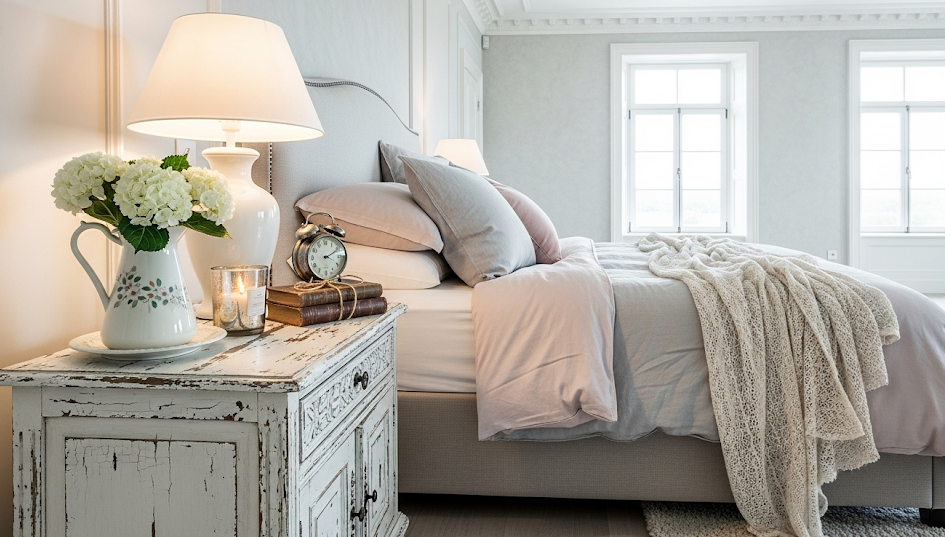
For the final styling, think about what would have sat on a bedside table in a romantic country home. A vintage porcelain lamp with a fabric shade, a small vase of fresh flowers, perhaps a few well-chosen books with beautiful covers, and maybe a vintage photograph in an ornate frame.
1. The Transformation Process is Simple but Requires Patience The seven-step process (clean, sand, prime, paint, distress, protect, hardware) takes 4-6 hours of actual work spread over several days. The key is using chalk or milk paint for that perfect matte finish, then gently distressing areas that would naturally wear over time like edges and handles.
2. Colour Palette is Crucial for Authentic Shabby Chic Stick to soft, muted tones like duck egg blue, sage green, dusty pink, and antique white - colours that look gently bleached by sunlight. These work because they're all from the same tonal family and complement rather than compete with each other.
3. Imperfection is the Goal, Not Perfection Unlike pristine furniture restoration, shabby chic celebrates deliberate imperfections, gentle wear, and aged patina. The magic happens in the distressing stage where you create authentic-looking wear patterns that tell a story of cherished use over generations.
Chalk paint and milk paint are the gold standards for shabby chic projects because they create that perfect matte, slightly textured finish. These paints also sand beautifully for distressing and don't require extensive priming on most surfaces.
The actual work time is about 4-6 hours spread over several days, allowing for proper drying between coats. Most of the time is spent waiting for paint and wax to cure properly, so patience is definitely a virtue in this process!
You don't need to completely strip old paint unless it's heavily chipped or peeling badly. A good clean and light sanding to create adhesion is usually sufficient, which is part of the charm of this forgiving style.
Start with light pressure and build up gradually - you can always sand more, but you can't put it back! Focus on areas that would naturally wear like edges, corners, and around handles where hands would frequently touch.
Yes, but you'll need a high-quality primer designed for slick surfaces first. The key is proper preparation - clean thoroughly, sand lightly, and use the right primer to ensure good paint adhesion.
Distressing involves physical wear like sanding and scraping, while ageing uses glazes, waxes, and stains to create the appearance of time and use. Combining both techniques creates the most authentic shabby chic finish.
A good quality furniture wax or water-based polyurethane provides excellent protection while maintaining the authentic matte appearance. Reapply wax annually in high-use areas to keep your piece looking beautiful.
Original vintage hardware often looks perfect as-is, but new reproduction pieces benefit from light distressing with fine sandpaper. The goal is to make everything look authentically aged and cohesive together.
Duck egg blue, antique white, and soft sage green are wonderfully forgiving colours that hide imperfections well. These shabby chic palette staples work beautifully in most bedroom colour schemes and complement each other perfectly.
Regular emulsion can work, but you'll need to add texture with a bonding primer and may need to sand more aggressively for distressing. Chalk paint's natural texture and easy distressing properties make the process much more straightforward.
Small touch-ups with your base paint colour usually blend seamlessly once waxed. For major errors, light sanding and repainting the affected area works well - the beauty of shabby chic is that imperfections are part of the charm!


